
Apartment Studio
See what’s happening at home, room by room.
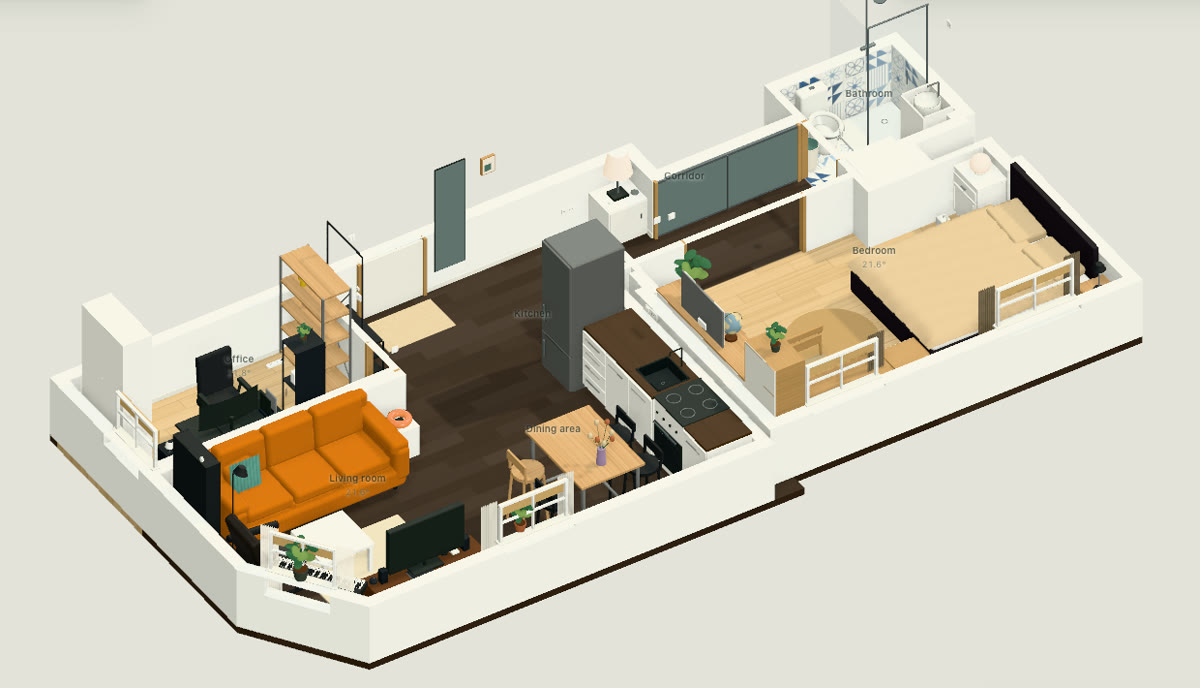
I built Apartment Studio because I wanted to find a light by looking at the room it was in. It’s a 3D model of my apartment that puts lights and other devices where I actually use them.
- A view of the whole apartment
- Rotate the 3D map, zoom into a room, or switch to a flat floor plan.
- Controls where you expect them
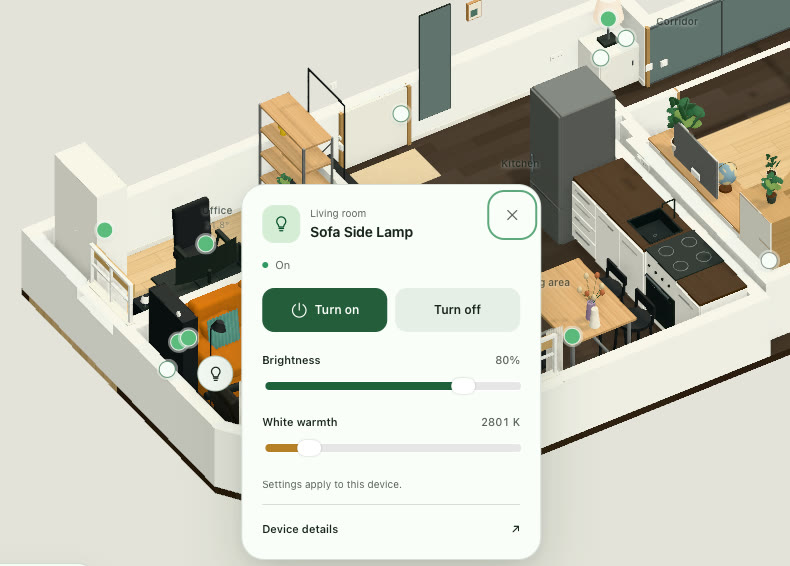
- Open a light on the map to see its controls, including brightness and white warmth where supported.
- Room and lighting views
- Focus on a single room or preview the apartment under different lighting.
Why I built it
In a device list, I have to remember which switch belongs to which light. I already know where the sofa and the dining table are. I wanted to use that knowledge to find and control a device by looking at the room.
I also wanted a way to see the whole apartment and then focus on one room. A furnished cutaway makes the apartment recognizable at a glance. A room view gives its controls enough space to use comfortably.
Screenshots
How I built it
- 1. Start from a scan of the apartment
- I used a RoomPlan scan as the starting point for the walls, doors and furniture. It gave me the layout and positions of objects. I kept the scan as a reference while I refined the furnished view.
- 2. Make it look like the place I know
- I used photos to refine what the scan could only approximate. The orange sofa, dark kitchen worktops and patterned bathroom tiles help me tell the rooms apart. Three.js draws the furnished view. The cutaway hides some ceiling fittings and high cabinets so they don’t block the view of the room.
- 3. Link the model to Home Assistant
- Each controllable device gets a place on the map and a link to its corresponding device in Home Assistant. The sofa lamp is a good example. I can open it from the model and adjust power, brightness and white warmth from the same panel.
- 4. Bring the map into a Mac window
- The Mac app hosts the same renderer in a native window. Dragging pans across the plan, rotating changes the angle and selecting a room brings its controls into focus. The 2D view is there when I want to read the layout quickly.
What I learned
I kept visible markers for the controls I reach for most, such as lights and the main TV. That made it easier to read the furnished view without showing a marker for every piece of equipment.
The app keeps the time of its last successful reading. If it loses the connection, I can still see the plan and the last reading with its age. That matters when I’m checking a light or temperature from elsewhere.